Setting the Stage for a Solid Weld
So, you’ve decided to tackle welding 1/2″ steel with your trusty MIG machine? Fantastic choice! It’s a powerful and versatile process that allows for creating strong, reliable welds on various projects. But like any skill, mastering it takes time, practice, and the right approach. Before we dive in, let’s set the stage for success.
First things first, safety is paramount! Welding involves high temperatures and electricity, so always wear appropriate personal protective equipment (PPE), including welding gloves, safety glasses, and long-sleeve clothing. Additionally, ensure proper ventilation to prevent fumes from building up. Connect your machine to a grounded outlet only, and never work on live circuits or equipment.
Understanding the Basics: What Makes MIG Weld So Special?
Now, let’s delve into what makes MIG welding stand out. The “MIG” in MIG stands for Metal Inert Gas, which refers to the shielding gas used during the process. This inert gas, typically argon or CO2, helps protect your weld pool from atmospheric contamination and oxidation – key ingredients for a smooth, high-quality weld.
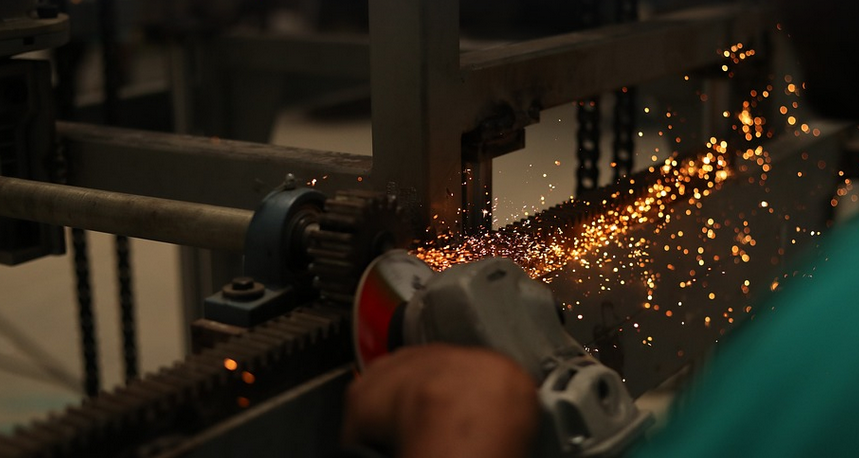
The power of MIG lies in its speed and versatility. With a constant feed wire method, you can quickly create beads of molten metal that bond the 1/2″ steel sheets together. This process delivers a clean, controlled weld with minimal spatter compared to other welding methods like stick or TIG.
MIG welding is also highly adaptable. You can use it for various applications, from building sturdy frames and shelves to repairing agricultural equipment and even customizing metal art projects. The versatility of MIG makes it an excellent learning tool, allowing you to experiment with different techniques and build your welding skills progressively.
The Steel-Weld Harmony: Choosing the Right Filler Metal
Before we get to the welding itself, let’s talk about filler metal – the crucial ingredient that binds the steel together. When it comes to 1/2″ steel, you want a wire feeder with a proper electrode size and composition for your specific welding application.
For general construction and fabrication, we recommend using electrodes designed for mild steel (like E70-S-6) or similar materials. These electrodes provide the perfect balance of strength, weldability, and cost-effectiveness for 1/2″ steel projects.
Tackling the Welding Process: From Setup to Finish
Now that we’ve covered the basics, let’s dive into a step-by-step approach to MIG welding 1/2″ steel. The journey of your welds begins with proper setup. First, ensure you have all your equipment in order; this includes your MIG machine, electrode wire, shielding gas tank, and safety gear – don’t forget your gloves!
Next, familiarize yourself with the correct welding settings – adjusting the wire feed speed, voltage, and amperage is key for optimal weld quality and efficiency.
Once you have these parameters dialed in, it’s time to bring in the steel. Start by laying down your 1/2″ sheet on a clean, stable work surface (using clamps if needed). Then, hold your welding gun at the desired welding position and begin applying consistent pressure.
The Art of the MIG Weld: Practice Makes Perfect
Welding is more than just hitting the trigger; it’s about understanding how to control the process for optimal results. Here are some tips to master the art of MIG welding:
- **Consistent Pressure:** Maintain a steady hand and apply consistent pressure on your gun while moving along your weld path.
- **Weld Pool Depth:** Ensure you’re welding to create a deep, controlled weld pool as this will result in the strongest bond.
- **Overlap and Gap Control:** Remember to overlap each bead by at least half of its length to avoid gaps.
- **Practice Makes Perfect:** Don’t expect to become a welding maestro overnight! Practice on scrap metal first to get comfortable with your machine, settings, and technique before tackling your real projects.
Don’t be discouraged if your welds don’t look perfect right away; it takes time and practice to develop the desired skill. The more you weld, the better you will become at controlling the speed and the heat input for a consistent, high-quality weld.
Troubleshooting and Troubleshooting Tips
No project goes without its hiccups! When faced with welding challenges, it’s essential to have solutions in place. Here are some troubleshooting tips:
- **Bad Weld Pool:** If your weld pool is too shallow or uneven, adjust the wire speed and voltage.
- **Spatter Issues:** This can be caused by improper welding technique, wire type, or incorrect shielding gas setting; use a cleaner wire if necessary.
- **Poor Penetration:** Adjust your amperage to correct penetration depth. Too high of an amperage will burn the metal too quickly and create spatter.
Looking Ahead: Future Welding Adventures
So, you’ve embarked on this welding journey with 1/2″ steel using MIG. Congratulations! Now that the basics are down, it’s time to let your creativity run wild and build upon your skills.
Remember, the best way to learn is by doing. Experiment with different projects, techniques, and materials as you explore the wide world of welding. Explore other welding methods like TIG or stick when appropriate for more specialized needs. The journey of a welder is never-ending – it’s about continuous growth and learning.